Uncategorized

copper sulfate treatment for pool water in singapore

What Does Copper Sulfate Do To Pool Water?

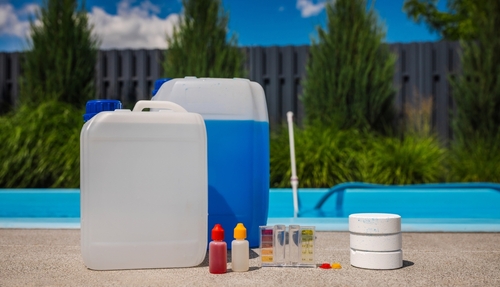
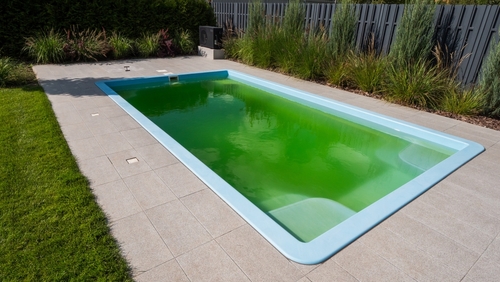
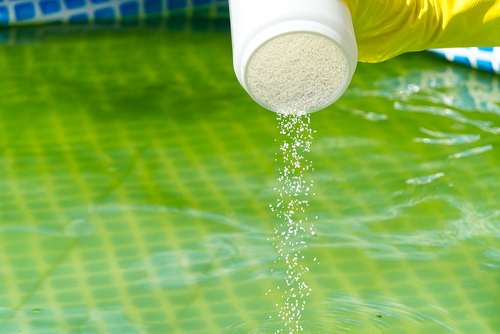
What Does Copper Sulfate Do to Pool Water? Pool owners are discovering an algae-killing compound that makes clearing up overgrowth easier than ever. Copper sulfate (CuSO4) is a chemical compound that purifies pool water by killing things like algae, bacteria, fungi, and other unwanted living particles in a pool environment. However, it should be used carefully and strategically for the best and safest results. Come learn how copper sulfate in pool water works against algae infestations. What Is Copper Sulfate? Copper sulfate is an algaecide and disinfectant that’s made from combining copper with sulfur. Its strength is ideal for tackling algae and bacterial overgrowth that is too extreme to be treated by ordinary pool chemicals. Copper sulfate is often commercially sold under the label of bluestone due to its vivid blue coloration. What Happens During Copper Sulfate Pool Treatment? Copper sulfate works by binding to proteins in algae in pool water. This binding power essentially “chokes” the cells within the algae to prevent photosynthesis. The cells within the algae will eventually break down and die. If you have fuzzy green growth in your pool that’s turning everything slimy and cloudy, it’s probably algae. Most experts suggest only using copper sulfate when you’re at risk for algae overtaking your pool. However, some pool owners who have had algae issues in the past choose to proactively use copper sulfate every so often to stop algae before it even starts. Many people who hear about copper sulfate wonder if they need to use it if their pools are chlorinated. The answer is that copper sulfate is not intended to be a replacement for chlorine. It is actually intended to work alongside chlorine to amplify its benefits. Pools need chlorine for daily sanitation. However, chlorine can sometimes fail to neutralize algae blooms. Algae types like black algae and mustard algae can be too aggressive and stubborn for chlorine alone once they take hold of pool water. This is where copper sulfate can come in to amplify the effects of chlorine. During treatment for algae, copper sulfate shifts the pool’s pH to make the environment inhospitable for algae. A big benefit of copper sulfate is that its effects last for quite a while. Unlike many pool treatments, it won’t evaporate or dissolve after a few hours. Copper sulfate can stay active in pool water for up to a few weeks. Should Copper Sulfate Be Used Often in Pools? Copper sulfate pool treatments are not intended to be used as part of regular chemical pool maintenance. This is considered a specialized treatment that should only be used in situations where algae growth is out of control. The reason why copper sulfate isn’t ideal for ordinary pool care is that it can dramatically shift the alkaline level of pool water. Can Copper Sulfate Harm Pools? Yes, it’s possible for copper sulfate to be harmful if it’s used incorrectly. It’s important to read the label of copper sulfate pool sanitizer to ensure you’re adding the correct amount. The compound should always be dissolved in a water bucket first instead of being poured directly into a pool. If too much is used, this can turn the walls of the pool green. Swimmers may also notice that their hair turns green with excessive copper sulfate. It’s also important to handle copper sulfate carefully because exposure to undiluted amounts can cause eye irritation, nausea, vomiting and other negative symptoms. Keep copper sulfate away from pets.

What Does Copper Sulfate Do To Pool Water? Read More »

shutterstock 2608071473

Why Regular Cleaning And Maintenance of Pool Is Required?

Why Is Regular Cleaning and Maintenance of a Pool Required? Pools are a much sought-after amenity in both residential and commercial properties. However, owning one comes with some significant responsibilities if you want it to remain in good condition. If you’ve never had to care for a pool before, it may seem like a daunting task. To help, here’s an overview of why pool maintenance is important, along with a brief guide to swimming pool maintenance. Why Pool Maintenance Is Important First and foremost, pool maintenance is essential to ensure a safe, clean environment for those using your pool. With just a few minutes of effort daily and weekly, you can accomplish the following: Slow or prevent bacterial growth Clarify your pool water Prevent pump and filter damage Extend pool lifespan Reduce ongoing repair needs As you can tell, regular pool maintenance yields some notable benefits. Now imagine what your pool would look like without maintenance. Its water would appear dirty or cloudy and could contain hazardous substances. Its structural elements may significantly deteriorate, making it visually unappealing and potentially unsafe. And, worst of all, your pool may need significant repairs to remain watertight and functional. Regular Pool Maintenance Basics Swimming pool maintenance isn’t as difficult as you might assume. There are only a few things you’ll need to do periodically to keep your pool in great shape. Few of the tasks are particularly labor-intensive, and you can even automate some of them. Here are the regular maintenance tasks you’ll need to complete: Run Your Pool Pump Every Day The most basic task you must perform to maintain your pool is to turn its pump on every day. Ideally, you want your pool’s pump running for between eight and ten hours every day. During periods of peak usage, you should run your pump even longer than that. Every time your pool’s pump runs, it accomplishes several vital tasks. One is that it filters the water, removing debris and detritus. That reduces how often you’ll need to skim and vacuum, and how long those tasks take. Another important thing a running pump accomplishes is thoroughly mixing pool chemicals. The chemicals you add to your pool keep the water safe for swimmers and prevent the buildup of biological contaminants. However, maintaining a uniform concentration of those chemicals in the pool water is critical. Your pool’s pump can ensure that, preventing chemical additives from settling so they function optimally. You can even use a timer to turn your pool’s pump on and off automatically as needed. Skim Your Pool and Empty Pump Baskets Another regular pool maintenance task you must perform is to skim your pool water. Typically, you’ll only need to do so every two to three days. However, if your property has any trees near your pool, you may need to skim your water more often. The good news is that the whole process should only take about five minutes. And the more often you carry it out, the less time you’ll spend getting it done. After skimming debris from the surface of your pool water, take a moment to empty your pool pump’s intake baskets. Those function like skimmers, keeping large debris out of your pool filter and pump while they run. If you neglect to clean them out, they may hamper water flow rates through your filter. That will not only affect the cleanliness of your pool water but also place unnecessary strain on your pump. Test Your Water’s pH And Chlorine Levels Test your pool water at least once per week to ensure proper pH and chlorine levels. Those levels must remain within acceptable limits to keep the water safe for swimmers. The correct pH for your pool depends on its materials. However, aiming for a pH of 7.5 should be perfect in most scenarios. That’s safe for all major pool finish types, as well as for swimmers. Your pool’s chlorine level should be between 1 and 3 parts per million. In practice, you should try to keep it as close to 2 parts per million as possible. Low chlorine levels can allow bacteria, viruses, and other dangerous microorganisms to flourish in your pool. High chlorine levels, meanwhile, make swimming uncomfortable by stinging swimmers’ eyes and irritating their skin. Brush Pool Walls and Vacuum Pool Floor You should also know that your pool needs its walls brushed and its floor vacuumed at least once a week. Brushing your pool’s walls removes any hard-to-see algae buildup and dirt. It’s essential to keep your pool’s filter running during and after brushing to capture those substances. If your pool has vinyl or fiberglass walls, a soft nylon brush should suffice for cleaning without risking damage. If your pool has a concrete finish, a stiffer bristle type is a better option. After brushing the walls of your pool, you must vacuum its floor. All manner of debris can settle onto your pool’s floor, even with its filtration system running. Vacuuming will remove that debris without stirring anything back up into the water. To minimize the work involved, it’s advisable to purchase a robotic pool vacuum. Most models can complete a thorough cleaning of the average pool in 1.5 to 3 hours. The time savings alone make them worth their cost. Additionally, robotic vacuums clean better than you can manually. Clean Your Pool Filter Finally, your pool’s filter requires periodic cleaning to keep working well. Unfortunately, there’s no exact cleaning interval you can follow. On average, most pool filters need cleaning every 4 to 6 weeks. However, there is a way to judge when yours needs cleaning. To do this, you must note the filter’s starting operating pressure. That gives you a baseline to judge your filter’s cleaning needs. If your pressure gauge reads in PSI, your filter needs cleaning when pressure rises 5-10 PSI from a clean operating state. If your pressure gauge reads in Bar, look for an increase between .3 and .6, which indicates a need for cleaning. Enjoy

Why Regular Cleaning And Maintenance of Pool Is Required? Read More »

Swimming Pool Maintenance Tips Singapore: Step-by-Step Guide

Swimming Pool Maintenance Tips Singapore: Step-by-Step Guide

Swimming Pool Maintenance Tips Singapore Step-by-Step Guide A well-maintained pool is one that stays clean, safe, and enjoyable throughout the year. In Singapore’s warm and humid climate, pools are frequently exposed to the perfect conditions for algae growth and collecting debris, so it’s even more important to establish a structured routine to prevent them. Step 1: Start with a Quick Visual Check Before anything else, start with a simple visual inspection. This sets the context for everything else. Walk around the pool deck and see if the water is clear, slightly cloudy, or greenish. Anything unusual indicates you’ll need to conduct a more thorough cleaning or adjust the chemicals. The water level should normally sit around the midpoint of the skimmer opening. If it’s too low, the pump can draw in air and lose prime. Too high, and skimming becomes less effective at removing surface debris. Step 2: Clean the Surface and Interior Removing debris early reduces strain on the filter and makes chemical treatment much more effective. Use a leaf skimmer to get rid of leaves, insects, and other floating materials. Regular skimming prevents decomposing matter from affecting the water quality. Then brush the entire interior, including the walls, floor, steps, ledges, corners, and less visible areas. This breaks up any biofilm and algae that may be forming. Finally, vacuuming removes dirt and fine particles that may have settled on the floor. Step 3: Support Good Circulation Effective circulation supports nearly all other pool maintenance tips by distributing chemicals and preventing stagnancy. Start by inspecting the pump and skimmer baskets for any trapped leaves or other debris. Blocked baskets restrict water flow and put unnecessary strain on the pump motor. Listen for any unusual sounds from the pump, such as rattling or grind, that may indicate air leaks or blockages. Circulation is a simple yet powerful foundation of most swimming pool maintenance tips. When water moves consistently, chemical treatment is more effective. Step 4: Test the Water’s Chemistry Once the water is circulating and the pool is physically clean, test and and adjust the water chemistry. This protects swimmers as well as equipment. Use a reliable test kit or a digital meter to check:  pH levels  Total alkalinity  Sanitiser level (including free chlorine)  Stabiliser (cyanuric acid), if applicable  Calcium hardness In general, aim for a pH level between 7.2 and 7.6 and a total alkalinity within 80 to 120 ppm. Balanced alkalinity also helps stabilise pH. Step 5: Clean the Filtration System Most filters have a pressure gauge. When the reading rises around 20 to 25 percent above the “clean” pressure level, it’s time to clean that filter. For sand or diatomaceous earth filters, backwash according to the manufacturer’s instructions. This reverse water flow and flushes out the trapped debris. For cartridge filters, remove the cartridges and rinse them thoroughly with water. Step 6: Prevent Algae and Cloudy Water Once circulation, cleaning, and filtration are in order, the focus shifts to preventive care. Preventing algae and unusable water is more efficient and less expensive than treating full blooms. Routine brushing works by removing early algae growth before it becomes visible. Occasional shock treatment via superchlorination may be recommended, especially: After pool parties or an event with many swimmers  After storms that bring significant debris  When water starts to dull or look cloudy As always, remember to follow the product guidelines and avoid using the pool until sanitiser levels return to a safe range. Step 7: Manage the Pool’s Surroundings A pool’s surroundings is an often overlooked part of pool maintenance tips, yet it can make a meaningful difference. Trim overhanging trees and shrubs to reduce leaves and other plant matter falling into the pool. Be sure to sweep and wash the surrounding surfaces regularly to reduce dust and soil contamination as well. It’s also wise to avoid putting metal furniture near the water where they can rust and cause staining. Likewise, be sure any fittings or fixtures by the pool are suitable for wet outdoor conditions. Step 8: Inspect Equipment and Controls Beyond the pump and filter, modern pools often have heaters, timers, and automation systems that must also be checked. Verify that the timers and control systems are running on the correct programmes for circulation and sanitising. Incorrect schedules reduce effectiveness while increasing energy costs. Then look for damp areas around any pipes, valves, and joints. Even tiny leaks contribute to unnecessary water and chemical loss, and they can grow into even larger problems. Step 9: Establish Weekly, Monthly, and Annual Tasks To keep maintenance organised, it’s useful to group tasks by frequency to ensure nothing important is overlooked. Weekly tasks:  Skim, brush, and vacuum  Empty the skimmer and pump baskets  Test and adjust water chemistry  Check the water level     Monthly tasks:  Inspect filter pressure and clean as needed  Inspect fittings, seals, and visible pipes  Check timer settings and circulation     Annual or semi-annual tasks:  Service major equipment  Assess filter components  Review the overall pool condition Having a structured structure for pool maintenance tips can help anyone in Singapore avoid unexpected costs and downtime. Step 10: Know When You Need a Professional Even with a well-planned routine, there are some times when professional service is the best option. Complex repairs, persistent algae blooms, and major equipment issues usually benefit from specialist attention; professional pool technicians have diagnostic tools, experience with local conditions, and access to replacement parts. The Bottom Line A clear and practical routine turns pool care from a reactive process to a predictable one. By following this step-by-step guide, homeowners and business owners in Singapore can apply these proven swimming pool maintenance tips in an organised way. The end result is a pool that stays safe and welcoming and equipment that stays protected.

Swimming Pool Maintenance Tips Singapore: Step-by-Step Guide Read More »

How to Remove Sediment From Pool Bottom | Singapore Pool Guide

How to Remove Sediment From Pool Bottom | Singapore Pool Guide

How To Remove Sediments From The Bottom Of Pool? Having a clean swimming pool is not only important for aesthetics, but it is also essential for your health and the longevity of the pool basin. In addition to debris floating on the surface of the water, you can experience sediment at the bottom of the pool. Sediment is generally comprised of dirt, leaves, minerals, sand, and other organic matter. Not addressing sediment with routine pool maintenance will lead to a clogged filtration system, discolored water, and algae growth. In this article, we’ll discuss the different steps for how to remove pool sediment from the pool basin. Prepare for Pool Sediment Removal Before you actually tackle the process of removing sediment from the bottom of your pool, you want to test the alkalinity, calcium hardness, chlorine levels, and pH of the water with a pool water test kit. Doing this will tell you what might be contributing to sediment buildup, such as acidity, minerals from hard water, and inadequate chlorine to keep the water clean and healthy. Properly balanced water chemistry will help to prevent further buildup once you have removed the sediment. The next step is to gather the tools you will need to remove sediment. These include: Skimmer net with pole Scrubbing brush designed for your pool surface Specialty pool vacuum Filter cleaning chemicals How to Remove Sediment From Pool Bottom How to remove pool sediment is pretty straightforward. If you don’t have the time or tools to do this regularly, consider hiring a professional pool cleaning service to maintain your pool. Otherwise, you or your staff member can follow these four steps. 1. Skim the Water Surface Using a skimmer net that has a telescoping pool attachment is the easiest way to catch and remove debris from the water’s surface before it sinks to the bottom. You will be grabbing leaves, insects, and surface scum. Dispose of the wet matter away from the pool so it doesn’t get blown or tracked back into the water. 2. Scrub the Pool Walls and Steps Grab the proper brush for your pool material. For instance, stiff nylon or stainless steel bristles are appropriate for concrete and plaster walls. Softer nylon brushes are better suited to vinyl and fiberglass surfaces. Using the long handle attachment, scrub from the top down to allow for algae and other surface matter to settle to the bottom, where the vacuum will suck it up. 3. Vacuum the Pool Take a mini-break to allow the scrubbed debris to settle to the bottom of the pool. Decide whether you will use a manual vacuum with a handle and pole attachment or a robotic hands-free pool vacuum that will get the job done while you continue to relax. Either way, turn the filter system to the “waste” setting to make sure that dirty water doesn’t continue to recirculate. If using a manual vacuum, work methodically, moving back and forth until you have covered the entire pool basin. Vacuuming is the most important step when planning how to remove sediment from a pool bottom. 4. Turn On the Filtration System Once you have thoroughly vacuumed the pool basin, run the filtration system for a full day, approximately 10 hours. This will grab all the remaining particles that were dispersed into the water that the vacuum didn’t capture. Once you have filtered out the last of the dislodged debris, clean the filtration system. This will depend on the type of system you have. Follow the manufacturer’s instructions for backwashing and cartridge cleaning. Final Thoughts A clean pool is an inviting asset for you and for your guests, whether it is a private residential pool or one at a resort or club. Knowing how to remove pool sediment is key to maintaining your pool. Skim and vacuum your pool once a week to prevent sediment buildup. Then, follow these four simple steps for a more thorough sediment removal to ensure that your pool is clean, safe, and inviting.

How to Remove Sediment From Pool Bottom | Singapore Pool Guide Read More »

The Best Way to Clean swimming Pool Basin

The Best Way to Clean swimming Pool Basin

The Best Way to Clean Your Swimming Pool Basin It’s true that thoroughly cleaning your swimming pool basin is a job of work, but it’s necessary. This is especially true in places such as Singapore, whose warm climate allows the pool to be open nearly all year. The good news is that technology continues to make pool cleaning a little less arduous than it used to be. Here’s how to clean a swimming pool basin. Gather Your Equipment Certain equipment helps you clean your pool more efficiently. They include: Hand or leaf skimmers Pool vacuum, including equipment such as a telescopic pole, vacuum head, hose and plate. Pool brush Testing kits As with the tools you use for gardening, painting or maintaining your home, you should buy sturdy, good-quality tools. Remove Debris Right Away One thing you’ll need to do to clean your pool is remove any debris. Remove it by hand or via a hand skimmer while it’s still floating on the surface of the water. Debris that sinks to the bottom of your pool is going to be that much harder to take away. Clean Out the Strainer Basket You’ll also need to clean out the strainer baskets once a week or so. You’ll find your pool’s strainer basket in its skimmer. To clean it, turn off the pool’s cleaner pump, and shut the drain and skimmer valves. Take off the pump lid, remove the strainer, then gently wash it out with a garden hose. Remove larger pieces of debris by hand then let the strainer dry. Because it takes a while for your strainer to dry completely, it’s a good idea to have at least a pair of them if you want to keep your pool open. When the basket is dry, check it to make sure it’s sound, then reinsert it. Check to make sure the O-ring and the lid of the pool pump are also in good shape, then put the lid on. Make sure it’s tight but not too tight. Some pool contractors recommend lubricating the O-ring with vaseline before replacing it. When the strainer basket has been replaced, turn on the pump, let it run for a couple of minutes, then open the skimmer valves one by one. Wait till you see water coming out of the air relief valve, then close it, and turn the cleaner pump back on. Vacuum Your Pool Basin Another cleaning task you should do at least once a week is to vacuum your pool. There are three basic kinds of pool vacuums. Suction-side. This vacuum uses the pool’s filter pump to pull debris through the vacuum hose into the skimmer. Pressure-side. This type of pool vacuum uses water pressure to pull in debris. Unlike the suction-side vacuum, it’s powered by a separate pump. This puts less stress on the pool’s filter but uses more energy overall. Robotic. These vacuums don’t depend on your pool’s systems to work. It plugs into your home’s electrical system, so you can use it when your pool is closed. A robotic vacuum operates rather like the robotic vacuums in your home. Sensors allow it to run over the basin’s walls and floor and clean them. Some pool experts believe robotic vacuums are the best, though they’re expensive. Others believe they are only good for light cleaning, and you’ll still need to vacuum your pool basin manually. To vacuum your pool manually, you should first assemble the vacuum, then attach it to the skimmer after taking out the strainer basket. Make sure there’s no air in the vacuum hose. You can choose “filter” or “waste” for the filter valve setting. The first setting is for light cleaning, while the second removes larger pieces of debris. The “waste” setting sends dirty water down your sewer pipe and may even lower the level of your pool water. You may need to use your garden hose to keep the water level from dropping as you vacuum. When you start to vacuum your pool, handle it the way you handle your indoor vacuum. That is, move the vacuum at a leisurely pace and make sure the passes overlap. Vacuum until you’re satisfied that the pool basin is clean. After that, disconnect the vacuum, clean out the skimmer, and check the filter pressure. If it’s made of sand or diatomaceous earth, backwash it if it’s 10 pounds per square inch above the clean starting pressure. Then, test the pool water to make sure levels such as pH and alkalinity remain balanced. Brush After Vacuuming If your pool basin has algae, brushing your pool may be necessary even after a thorough vacuuming. Algae is tough to get rid of with just a vacuum, and it may take a pool brush and elbow grease to get remove it. The same is true with mineral deposits. Brushing your pool regularly also prevents etching and stains. Experts recommend a stiff-bristled brush for a concrete basin and a brush with softer bristles for a basin made of fiberglass, vinyl or tiles. Aside from brushing to remove algae or limescale, you’ll need to brush your pool basin after you add chemicals to it. You’ll need to brush even more frequently after your pool is replastered or pebbled. Some experts even recommend brushing a pool twice a day for as long as three weeks after it’s been so treated. Some tips when it comes to brushing your pool include starting at the same point and moving in the same direction each time to make sure you get good coverage. The same starting point should be the pool steps. Steps need to be brushed because they’re tough to vacuum properly. Keeping your pool basin clean is one way to make sure it’s safe and fun to swim in. If pool basin cleaning seems too laborious, don’t hesitate to call a pool specialist for help.

The Best Way to Clean swimming Pool Basin Read More »

shutterstock 2362832625

Why Is Pool Water Still Green After Shocking?

Why Is Pool Water Still Green After Shocking? Many homeowners have experienced this frustrating situation, and they feel perplexed about what may be the cause. You expect sparkling, clear water the next morning after you pour in a considerable amount of pool shock. Instead, the pool remains stubbornly green. Sometimes, the green coloring becomes even more pronounced. It’s natural to wonder why this essential cleaning step failed to have the outcome that you expected, especially if you have correctly measured and applied the strong chlorine product. Here are some reasons that this happens. Abundance of Algae What many homeowners do not realize is that an abundance of algae is normally responsible for why pool water is still green after shocking. Shocking is the process of adding a large, concentrated dose of chlorine to kill these contaminants. This frees up combined chlorine molecules. However, if the pool is heavily contaminated, there may not be enough shock treatment to kill the algae that is present. Not Using Enough Chlorine A very common mistake that so many homeowners make is consistently adding the standard amount of chlorine, even though more may be needed. The considerable volume of algae will immediately consume the chlorine that is added to the pool. When this happens, there is no residual sanitizer to keep the water clean. The algae will continue to multiply rapidly because this initial dose was insufficient. Imbalance in Water Chemistry Another major factor that prevents shocking from working correctly is if the water chemistry is off balance. Chlorine is a powerful sanitizer. But for it to be effective at all, the pool’s pH must be at ideal levels. The pH scale measures the acidity of the water. The pH of your pool water should ideally be between 7.4 and 7.6 for chlorine to do its job properly. The chlorine will become chemically sluggish if your pH is too high, especially if levels are at 8.0 or above. Because all the chlorine is inactive at this point, the algae will continue to thrive and reproduce. Debris in the Pool Having leaves and dirt in the water can also be responsible for a green pool after shock treatment. The chlorine has to use up all its energy to break down this debris. This leaves nothing left over to contend with the algae. You must make certain that the pump and filter are running continuously during and after the shock treatment to help collect the dead algae and contaminants. This will prevent the pool from reverting to its previous green state. Heavy Metals The presence of heavy metals, such as copper or iron, can turn water green when they are oxidized by chlorine. Although this color is not caused by algae, many pool owners mistake it for an algae bloom. If the water turns a bluish-green or a brownish-green immediately after shocking, you may need a sequestering agent to bind and remove the metals. Adding more chlorine will not solve the problem. So that you do not waste your time and money on using the wrong chemicals, it is strongly advised that you procure a high-quality test kit. Such kits will provide you with adequate information that will help you tweak your pool cleaning routine so that you can avoid contending with the frustration of a green pool after shock treatment. Periodically working with a professional can also be helpful. They can find and fix problems that have been lurking beneath the surface before they get out of control.

Why Is Pool Water Still Green After Shocking? Read More »

shutterstock 1780838981

How To Kill Algae In Pool?

How To Kill Algae In Pool? Algae in your pool can be a big issue when you want to entertain or enjoy a nice swim on a beautiful day. This guide will show how to get rid of pool algae and how to kill algae in your pool to ensure no ongoing issues. On how to get rid of pool algae, there are a few different options you can pursue. The first step is to remove algae build-up from pool surfaces using an abrasive pad or scrub brush, cleaning the filter if there is a filter system present. Another way to kill algae building up in your pool is to shock the water with a large amount of chlorine to kill any algae that may be currently forming in the water. For shocking the water system there are a few different forms of chlorine to choose from. Using chlorine tablets is easier for measuring and takes less thought to use but can add additional calcium to the water which can result in additional build-up within the filter system. Liquid chlorine is another option, with the benefit of choosing liquid is that it will not add extra calcium to the water. When choosing to shock the system, there are a few rules to follow to ensure your pool is safe and ready to enjoy. The first rule being that regardless of which form of chlorine you are using, you must run the pump system for 12-24 hours to guarantee the shock treatment is properly mixed into the water system. You will know the shock treatment is working by the water turning cloudy or blue; these are signs that the algae are dying and ready to be fully removed. After this has happened, it is recommended to drain the water from the pool and use a shop vacuum or other wet use vacuum system to clean the remaining debris. After cleaning the remnants of the algae from the pool and refilling with water, it is recommended to check and clean the water filter to safeguard the life of your filter. If there are still additional algae left behind after the first shock treatment, you can reapply the treatment until your water is to your standards. After you have finished killing all the algae in your pool there are a couple of things that can be done to assist in the upkeep and cleanliness of your pool. One big thing that needs to be addressed after finishing with a shock treatment is to monitor the pH levels of your pool to avoid any skin irritation after swimming. The proper pH levels that you should make sure your water is maintaining are (7.2-7.6), which can be checked with a variety of testing methods including test strips, liquid test kits, and digital testers. Test strips are dipped into the water and matched to a color chart to show PPM (Parts per Million) of shock treatment solution in the water. Liquid test kits work very similar to test strips, but instead of placing the strip into the water to determine pH level, a small amount of water is placed into a vial, and a similar color chart system is usually used. Digital testers are the easiest to use as most will give very detailed readings quicker than conventional test kits.

How To Kill Algae In Pool? Read More »

shutterstock 1518635063

How To Choose The Best Pool Contractor In SingaporeHow To Choose The Best Pool Contractor In Singapore

How To Choose The Best Pool Contractor In Singapore Swimming pools offer Singapore homeowners and renters and hospitality, service, and other business customers beautiful, clean, and safe spaces to cool and relax their bodies and minds, refresh their spirits, and enjoy positive, uplifting social interactions. Additionally, swimming pools are a solid real estate investment that increases the value of rural, suburban, and rural properties over time by providing a feature that buyers often look for first during sales. Yet, the value of a swimming pool in any region in the country depends greatly on the knowledge and skills of the pool contractor that designs, installs, and maintains it. Whether you’re searching for the best pool contractor to help you with a new residential or commercial design, installation, inspection, maintenance, emergency repair, or renovation project, you need to consider several factors before making a final selection. What to Look for in a Pool Contractor An online search using the keyword phrase “how to choose a pool contractor in Singapore?” isn’t necessary to find the best one. In fact, a general search might lead you to swimming pool service providers who fail to understand challenges and obstacles related to local climate, geography, and legal requirements or lack the experience needed to complete a specific residential or commercial project. Instead of selecting a contractor at random, use the following list as a guide to find the best one available in your local area: Request Help From Social Networks Some of the people you interact with daily in your community or at school or work might know top contractors in your region, especially if they currently own or manage one or more private or public swimming pools. Additionally, online communities on popular social networks like WhatsApp, Facebook, Instagram, TikTok, LinkedIn, and Reddit often contain people seeking and recommending contractors for this type of work. Check Related Services and Experience Never trust online searches or networking recommendations without performing additional research. The contractor you ultimately choose must offer the services you need and have enough experience to complete the job right and on time. For example, the knowledge, skills, and tools required for designing and installing a luxury outdoor infinity pool in a hotel setting can differ vastly from those required for an indoor therapeutic hospital pool. The best contractor provides a detailed outline of their services on their website. They eagerly offer without prompting proof of extensive positive reviews, testimonials, and referrals. Their clients often make recommendations and talk positively about finished and long-term results, communication, customer service, and follow-up maintenance, repairs, and emergency services. They can also supply you with a photo portfolio that shows their step-by-step process and the results of past projects. Lastly, they have current insurance coverage, licensing, and certifications. Demand Detailed Answers to Questions Some bad contractors and criminals present potential customers with premium-looking website pages and affordable or even cheap price promises. To find the best swimming pool contractor in your community, you need to look beyond potentially false impressions and misrepresentations. Write down all details that pertain to your project, including those related to design, size, budget, location, and other concerns. Make a list of frequently asked service questions. Since eco-friendly and health-and-wellness features increase a pool’s value and protect swimmers from biological and chemical dangers, ask about what options the contractor offers to reduce energy and water consumption and waterborne diseases. Present the project description and questions to any contractors that have gained your interest as candidates. An efficient, hard-working, and trustworthy contractor can easily provide a quote that includes line-by-line information and cost details about estimated materials, labor, and service time frames. They’re also willing to guarantee in writing that they charge no hidden fees, follow all legal requirements, and have appropriate credentials. Pick a One-Stop Contractor If you’re like most busy people living and working in Singapore, you don’t want to deal with multiple swimming pool contractors. Instead, always look for a full- or total-service firm that offers more than design and installation services. The best ones regularly test and clean pool water and all surfaces. They also repair equipment after inspections to help owners prevent expensive emergency calls and provide a warranty and follow-up maintenance and repair services. For maintenance and emergency repair appointments, a top contractor guarantees that they only use original parts or manufacturer-approved ones. Their warranty typically covers all hardware, the surfaces and underlying structures, material defects, and accidental installation or repair failures and damage. Why Choosing the Right Pool Contractor Matters Although the beauty of Singapore’s natural and urban spaces and tropical climate are praised by visitors from around the world, the country’s high temperatures, extended humidity, coastal sea air, and sudden heavy rains often cause significant swimming pool maintenance and safety problems. The best contractors regularly address common residential and commercial issues like algae and bacteria growth, cloudy water, damaged tiles, foul odors, pump and filtration breakdown, and strange noises. They understand that heat and humidity can rapidly promote algae and bacteria growth and that direct sunlight can decrease protective chlorine and interfere with water pH levels. They use the most up-to-date technologies and training to help them recognize these common issues and many others, including hidden leaks and poor installations by other contractors. If they’re a coastal expert, they also regularly see and treat equipment problems that occur because of corrosive chemicals in the air. They help their clients avoid emergency repairs by performing the intensive inspections and maintenance needed to make indoor and outdoor Singapore swimming pools perform optimally at all times throughout the year. A proven, trusted local pool contractor doesn’t want you or anyone else who uses your pool to experience costly disruptions to their lives or schedules. Their primary goals are to help you receive the most benefits from your pool for as long as possible and save money in the process. By helping clients, they guarantee positive expansion and a high brand reputation in local and national markets as well. Finding

How To Choose The Best Pool Contractor In SingaporeHow To Choose The Best Pool Contractor In Singapore Read More »

shutterstock 1308674764

How to Build Your Swimming Pool

How to Construct a Swimming Pool A swimming pool can add value to a home, but hiring a contractor to install one can be pricey. Fortunately, with some planning and preparation, installing a swimming pool can mostly be a DIY project and can add substantial value to your home. However, those who add a swimming pool to their current home may not always recoup their initial investment when they sell the house. The First Step: Planning Your first step after you decide to add a swimming pool is to decide which type of pool you want. Local zoning laws, your needs, and your budget will be the primary determining factors. Overall cost can be the major factor, as well as the maintenance requirements and safety laws. When planning your swimming pool, be sure to include the price of hiring licensed professionals for electrical, plumbing, and so forth, as this can cost several thousand of dollars. Always overestimate this cost so you don’t run short on funds. Consider the Long Term Although you may like the idea of a pool now, in ten years, when you’re ten years older, it may seem like it wasn’t such a good idea because of the maintenance work involved. So consider your age when planning to build a pool. Types of Pools After deciding whether you want an in-ground pool or an above-ground pool, you have several other options, such as: Concrete:Concrete pools are more expensive initially and require more maintenance than other types. They can be installed above ground and are often used when an in-ground pool isn’t feasible. Fiberglass:Fiberglass pools can be installed either in the ground or above the ground, but they’re more limited in size. They’re relatively easy to install and maintain, and are often less expensive initially. Vinyl:Vinyl liners can be installed in the ground or above it. They’re one of the most affordable types of pools, can be installed more quickly than other types, and are suitable for areas with weather extremes and seismic activity. Vinyl pool maintenance is relatively simple, and it’s easier to maintain the correct water pH. However, vinyl pool liners will need to be replaced every 5 to 10 years, which offsets the lower initial cost. They’re also susceptible to leaks and puncture damage. Other considerations, such as salt air and water hardness, can affect the appropriateness of a vinyl pool in some instances. Before Starting on a Swimming Pool… After you’ve decided on the type and design of swimming pool you’d like, stake off the area and avoid large tree roots. You may need to check with your local building department to determine the location of any underground utilities. Next, check the local building and zoning codes to ensure you’re in compliance with them and apply for the required permits. You’ll probably not receive immediate approval for your permits, but you may be able to apply for expedited approval. After Permit Approval Once your permits have been approved, double-check your staked-off area to ensure that your design is feasible, and then you can begin excavation. You’ll need several types of heavy equipment, depending on the site, so make sure it’s available in your area. After Excavation Once excavation is complete, you can install the electrical and plumbing lines. For these two steps, you’ll need professionals. Don’t try to DIY the electrical and plumbing unless you’re a licensed electrician and plumber, because these steps require approval from the local building inspector. If the electrical and plumbing for your pool isn’t professionally installed, it may not be covered under your homeowner’s insurance. Concrete Pools If you’re installing a concrete pool, you’ll need to install steel rebar to reinforce the concrete. Gunite or shotcrete will be sprayed over the frame to create the concrete shell that’s the pool. This step takes several days and must be allowed to cure completely, which affects the overall time needed to install a concrete pool. Finishing the Pool At this point, you can finish the inside of the pool. If you’re using an aggregate coating, plaster, or tile, you’ll install it now, as well as the coping tile around the upper edge so that there’s a smooth transition to the deck. This is also the time to install a diving board, jets, a waterfall, or other custom addition to your pool. At this point, you’ll need another inspection from the local building department. This can take one or more weeks, depending on the backlog at the building department, so don’t start filling the pool. Filling the Pool Filling your pool can be done with a garden hose, or you can hire a water delivery service. Speak to your local water authority before you start filling your pool with a garden hose. At a minimum, you’ll probably be using 10,000 gallons of water, and larger pools can hold 30,000 gallons or more. This cost should be included in your overall cost estimate for building your swimming pool. Time Required Typically, it will take two to three months to construct a swimming pool. This includes the design stage, the time to apply for and process the permits, site preparation, and installation of the pool. Vinyl pools usually take less time; concrete pools can take longer. Subcontractors, such as electrical and plumbing, may extend the time because of business scheduling, and custom features, such as masonry, can extend the time needed. Safety Many states require the installation of a fence or other safety measures around a pool. When speaking to your building department when you’re researching building a swimming pool, ask them about required safety measures. You can work on that during curing times and the time it takes to get your permits approved. Alternatives to Building Your Swimming Pool Depending on your needs and circumstances, a pool kit or stock tank can provide an affordable and simple pool with a minimum of excavation and professional services. Solar pumps can help keep energy affordable, and alternative landscaping such as mulch, plants, or stone

How to Build Your Swimming Pool Read More »

shutterstock 2150846913

How Swimming Pool Remodeling Specialist Help + Essential Remodeling Tips

Essential Swimming Pool Remodeling Tips and How a Pool Remodeling Specialist Can Help Swimming pools add a touch of luxury and class to any property. However, as they age, that can change fast. A dilapidated or outdated pool can hamper usability or even turn your pool into an eyesore. Certain pool types can degrade to the point of needing remodeling in as little as five years. In most cases, though, you can expect a pool to last about ten years before requiring significant rehabilitation. When that time comes, you’ll have the opportunity to remodel your pool into a modern oasis. Here’s how to tell when it’s time for a remodel, tips for doing so, and how a pool remodeling specialist can help ensure a successful pool transformation. How To Tell It’s Time for Swimming Pool Remodeling Although you can remodel your pool anytime, most people wait until it shows noticeable wear. Some of the signs to watch out for include: Rough inner surfaces or damaged plaster Chipped, missing, or damaged tiles Warped or bowing decks Cracks in pool interior You may also decide to carry out swimming pool remodeling if yours lacks modern features such as anti-slip surfaces, automated cleaning, and LED lighting. Those features can make your pool safer and help keep it clean with less effort. Even if your pool is relatively modern, you may choose to remodel if your needs change. For example, if you installed your pool before having children, it may not be well-suited to your little ones. You may need to add a shallower end, a pool slide, and other kid-friendly features. Pool Remodeling Tips Once you’ve decided to move forward with swimming pool remodeling, you’ll have countless decisions to make. If you want your project to succeed, keep the following tips in mind: Start by Setting a Budget A pool remodeling project can be costly. And it’s also the kind of project whose costs can grow exponentially due to scope creep. That often happens as you think of new features and amenities to add after you’ve already begun construction. To keep your project affordable, you should create a budget that’s strictly limited to what you’re willing to spend. Then, as your project proceeds, refrain from making changes unless you can offset the costs elsewhere. Do Plenty of Visual Research With your budget set, you should next conduct extensive visual research to determine which features you want to add to your pool. It will also help you decide on a visual style to unify your project. Having photos of pools with features you like can also help the contractor you choose understand exactly what changes you’re requesting. That way, there’s no ambiguity in their interpretation, and you won’t have any unwelcome surprises at the end of your project. Prioritize Feature Additions While planning your pool remodeling project, it’s a good idea to list the features you’re considering adding. Then, rank them in order of importance. If there are any features you consider essential, mark them as such. Your feature list can help you make wise financial decisions and fit in as many of your desired changes as possible into your budget. Insist on High-Quality Materials While you’re juggling your swimming pool remodeling priorities, it may be tempting to economize on materials to create budgetary breathing room. In almost every case, doing so is a bad idea. Insisting on high-quality materials for your remodeling project helps guarantee you get the results you want. It also ensures your remodeled pool stands the test of time and won’t require another refresh soon after completion. Always Include Project Buffer Time Remodeling your pool can involve some significant inconvenience and disruption to your property. As a result, it’s natural to try to speed up the process. In reality, you should be doing the exact opposite if you want your remodeling job to yield the results you expect. Like any other type of construction project, it isn’t unusual for a pool remodel to take longer than initially planned. So, you should build plenty of buffer time into your project timeline to avoid any unnecessary rush work. Take Great Care in Choosing a Remodeling Specialist It’s not a stretch to say that your choice of contractor can make or break your swimming pool remodeling project. That’s why it’s critical to take your time in selecting the right one. Ideally, you want a contractor with years of experience and a verifiable track record. As you research the possibilities, ask prospective contractors for photos of completed projects. You should select a contractor who has produced results as close as possible to what you’re trying to achieve. You will also want to ask prospective contractors for bids for the exact work you want performed. You may need to adjust your project specifications or budget to align with your contractor of choice’s pricing. Why Hiring a Pool Remodeling Specialist Is Crucial By now, the answer to how a pool remodeling specialist can help with your project should be obvious. If not, consider the following points. An expert in pool remodeling will have a variety of tools at their disposal to help make your project proceed smoothly. For example, they may use 3D modelling tools to flesh out your proposed improvements before beginning work. That will let you see exactly what the results will be so that you can fine-tune aspects of your project beforehand. That alone will improve the odds you’ll have a satisfying result. A pool remodeling specialist will also help ensure your completed pool remains safe, and its systems work precisely as intended. If you choose an inexperienced contractor to save money, you’ll likely forfeit those savings in ongoing repairs due to substandard construction methods. A remodeling specialist will also have the experience to know if your pool’s underlying infrastructure needs serious upgrades or rehabilitation to support the changes you want. A less experienced contractor may fail to intuit those needs, leading to long-term problems for your pool. Those are only a

How Swimming Pool Remodeling Specialist Help + Essential Remodeling Tips Read More »

Appointment, Contact, Feedback

contact form

Name(Required)